
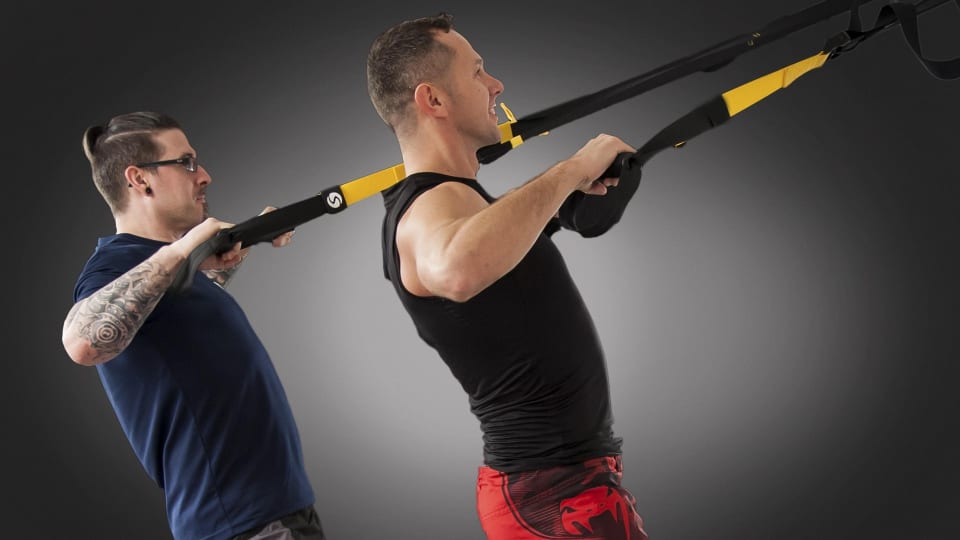
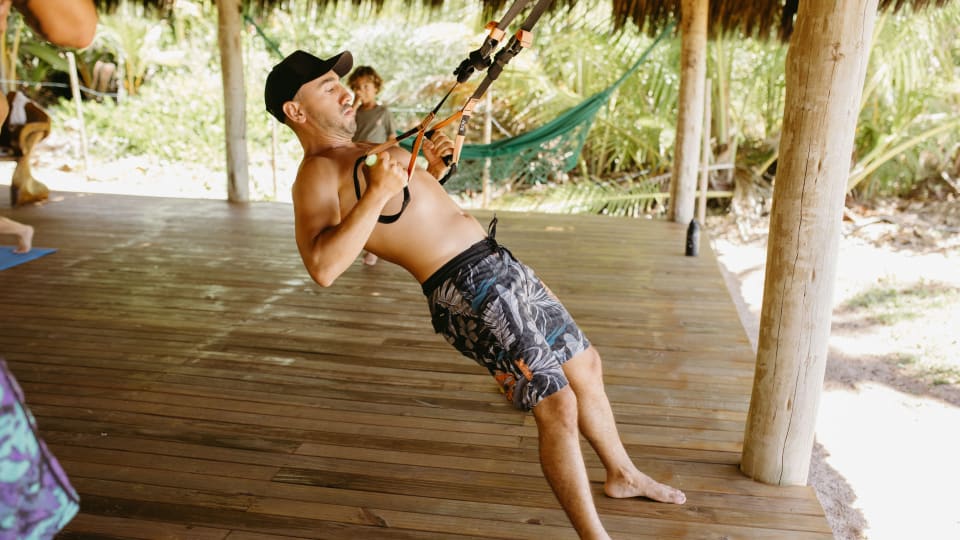
Your shoulders do a lot of work, whether you’re lifting, reaching, or just getting through a busy day. A suspension trainer offers a flexible, low-barrier way to build shoulder strength and stability without a full gym setup. If you’re ready to put your delts to work, here’s everything you need to know about adding TRX shoulder exercises to your workout plan.
(This post includes affiliate links for which we may earn a commission at no extra cost to you should you make a purchase. See our full disclosure and Privacy Policy for more information)
Page Contents
- Why Use the TRX for Shoulder Training
- Understanding Shoulder Anatomy for Better TRX Training
- TRX Shoulder Exercises (Fly)
- TRX Shoulder Exercises (Pull)
- TRX Shoulder Exercises (Push)
- TRX Shoulder Exercises (Other Movements and Combinations)
- TRX Shoulder Rehab and Rotator Cuff Exercises
- How to Structure a TRX Shoulder Workout
- Frequently Asked Questions About TRX Shoulder Exercises
- Key Takeaways for TRX Shoulder Training
Why Use the TRX for Shoulder Training
The TRX is a practical tool for shoulder training that works across a wide range of fitness levels and settings. Whether you’re training at home, in a gym, or while traveling, a suspension trainer requires minimal space and can be anchored almost anywhere. That accessibility makes it easier to stay consistent as you work toward your fitness goals.
Benefits of Suspension Training for Shoulder Strength
One of the more useful qualities of suspension training is how much you can change the challenge simply by shifting your body position. That kind of built-in scalability means the same exercise can work for someone just starting out and someone with years of training behind them.
Suspension training also tends to engage more muscle groups at once than isolated machine-based movements. When you’re working against gravity at an angle, your body has to coordinate across multiple joints to stay stable and controlled. For the shoulders, that means more than just the primary movers are being recruited.
How the TRX Engages Stabilizer Muscles
The unstable nature of the straps means your shoulder stabilizers are constantly working to manage movement and maintain joint position. This is different from pressing or pulling with a fixed barbell, where the path of movement is largely predetermined.
With a suspension trainer, small variations in grip, angle, and tempo all require the shoulder muscles to respond and adjust. The rotator cuff muscles, in particular, tend to be more actively engaged because they’re working to keep the shoulder joint centered throughout each movement. Over time, that kind of consistent stabilizer demand can support better shoulder function and reduce the risk of imbalances developing.
Who Can Benefit From TRX Shoulder Exercises
Suspension training for the shoulders is a reasonable option for most people, including:
- Beginners who want to build foundational shoulder strength with adjustable load
- Intermediate and advanced exercisers looking to add variety or address weak points
- People returning from minor shoulder issues who need a low-load starting point
- Anyone who trains at home or travels frequently and needs a portable option
That said, TRX is not the only way to train your shoulders, and it doesn’t need to be. It’s one useful tool among many, and how much value you get from it depends on how well it fits your goals and current training.
Understanding Shoulder Anatomy for Better TRX Training
You don’t need a detailed anatomy lesson to train your shoulders well, but having a basic sense of what’s there and what it does can make a real difference to how you move. When you understand which muscles you’re trying to work, you’re more likely to feel them working, and that connection tends to improve both technique and results.
The Three Deltoid Heads and Their Functions
The deltoid is the large, rounded muscle that gives the shoulder its shape. It has three distinct sections, each with a different role:
- Anterior deltoid (front): involved in pushing movements and lifting the arm forward
- Lateral deltoid (middle): responsible for lifting the arm out to the side
- Posterior deltoid (rear): involved in pulling movements and drawing the arm back
Many people tend to develop the front deltoid more than the others, partly because pushing movements are common in everyday life and in training. The rear and lateral heads often need more deliberate attention, making TRX fly and pull variations particularly useful.
The Role of the Rotator Cuff in TRX Movements
The rotator cuff is a group of four smaller muscles that sit deep within the shoulder joint. Their main job is to keep the head of the upper arm bone centered in the shoulder socket, especially during movement. They’re not the muscles you see in the mirror, but they’re doing important work behind the scenes.
In TRX movements, the rotator cuff is consistently active because the straps introduce an element of instability that requires constant joint control. This is one reason suspension training can be a useful addition for people focused on shoulder health, not just shoulder size.
Why Muscle Awareness Improves Exercise Outcomes
When you know which muscle is supposed to be working, you’re better placed to notice when it isn’t. That awareness helps you catch compensations early, like shrugging your shoulders during a row.
It also helps you make small adjustments that shift emphasis where you want it. A slight change in elbow angle or body position can mean the difference between training the rear deltoid and training the upper back. That kind of intentional movement is what separates going through the motions from training with purpose.
TRX Shoulder Exercises (Fly)
Fly movements on the TRX involve opening and closing the arms against the straps’ resistance, with the body held at an angle. They share some overlap with back and chest fly variations. The key difference with shoulder-focused positioning is the arm angle and the degree of body lean, which shifts the emphasis toward the deltoids.
TRX Rear Deltoid Fly
The rear deltoid fly targets the posterior shoulder and upper back, and it’s one of the more accessible TRX fly variations for beginners.
Setup: Adjust the straps to mid-length. Stand facing the anchor point, holding one handle in each hand with palms facing each other. Lean back slightly so there is tension in the straps.
Movement: With a slight bend in the elbows, open your arms out to the sides in a wide arc, squeezing the shoulder blades together at the end of the movement. Return slowly to the start position.
Key cues:
- Keep the movement controlled on the way back in
- Avoid shrugging the shoulders toward the ears
- The more you lean back, the greater the load
This exercise is a good starting point for anyone new to TRX fly movements. A more upright body position reduces the challenge, making it easier to focus on form before increasing difficulty.
TRX Y-Raises
Y-raises are named for the shape your body and arms make at the top of the movement. They target the lower trapezius and posterior deltoid and require good shoulder blade control.
Setup: Shorten the straps slightly. Stand facing the anchor point and lean back at an angle, arms extended in front of you.
Movement: Raise both arms overhead and out to form a Y shape, lifting your body as you do. Lower back down with control.
Key cues:
- Keep the arms relatively straight throughout
- Focus on drawing the shoulder blades down and back as you lift
- Avoid letting the lower back arch excessively
Y-raises are more demanding than they look. Starting with a less steep body angle allows you to build the movement pattern before adding load.
TRX T Deltoid Fly
The T fly opens the arms directly out to the sides, forming a T shape with the body. It targets the posterior deltoid and mid-trapezius and requires more shoulder stability than the rear deltoid fly.
Setup: Adjust straps to mid-length. Face the anchor point, holding straps with palms facing inwards. Step one foot forward into a slight split stance and lean back, arms extended forward.
Movement: Open both arms out to the sides until they are roughly parallel to the floor, keeping the elbows and wrists locked. Squeeze the shoulder blades together at the end range, then return slowly.
Key cues:
- Keep the wrists locked in a neutral position throughout
- Avoid letting the hips drop or the body sag
- A steeper lean increases the load on the posterior shoulder
The T fly is a step up from the rear deltoid fly in terms of shoulder demand. It’s worth building comfort with the rear fly first before progressing here.
TRX W Deltoid Fly
The W fly combines external rotation with a pulling motion, making it one of the more rotator cuff-focused variations in this category.
Setup: Adjust straps to mid-length. Face the anchor point and lean back slightly, arms extended forward with palms facing down.
Movement: Pull the hands back, letting the elbows drop down and bend into a W shape. Your shoulders will rotate at the same time, and your hands end up beside your ears. Squeeze your shoulder blades together, then return slowly to the start.
Key cues:
- Focus on the external rotation component, not just the pull
- Keep the shoulders back and down throughout
- Move slowly to feel the shoulder muscles working
The W fly is a useful movement for people who want to address rotator cuff strength alongside deltoid work. It’s generally suited to those with some TRX experience, as the coordination required takes a little time to develop.
TRX Shoulder Exercises (Pull)
Pulling movements on the TRX recruit the posterior shoulder and upper back together. The degree of body lean determines how much load you’re working against, which makes these exercises easy to scale. While they overlap with back training, you can increase shoulder engagement by paying attention to elbow path and shoulder blade position throughout the movement.
TRX Low Row
The low row is one of the most beginner-friendly TRX pulling movements. It targets the mid-back and posterior shoulder, and it’s a good introduction to how body angle affects load.
Setup: Adjust straps to mid-length. Face the anchor point, hold the handles with palms facing each other, and lean back with arms extended.
Movement: Pull your chest toward the handles by bending the elbows and drawing them back. Keep the body in a straight line from head to heels. Lower back down with control.
Key cues:
- Keep the elbows close to the body
- Avoid letting the hips drop as you pull
- A more upright starting position reduces the load for beginners
To shift more emphasis toward the posterior deltoid, focus on squeezing the shoulder blades together at the top of the movement. The video below shows you exactly how to progress the TRX low row to suit the level you’re at.
TRX Single Arm Row
The single arm row increases the demand on the prime movers and shoulder stabilizers of the working arm.
Setup: Face the anchor point and set yourself up with two hands on a single handle. (See the video below for exact instructions on how to set up the TRX, as it depends whether you have an older or newer model). Lean back, getting your body into a straight position, with arms extended and hands facing inward. Release one hand, keeping your free arm extended forward and in line with the working arm.
Movement: Pull your body toward the anchor point by bending the elbow and drawing it back. Keep your body square and avoid rotating your hips or torso. Return slowly.
Key cues:
- Keep your shoulders down and back
- Squeeze your shoulder blade back at the end of the pulling phase
- Control the lowering phase to build shoulder stability
This variation is suited to those who are comfortable with the standard low row and want a more advanced variation.
TRX Face Pulls
Face pulls target the mid back, external rotators, posterior shoulders and trapezius.
Setup: Adjust straps to mid-length. Face the anchor point and lean back, arms extended forward with palms facing down. Step further back for an easier version, or forward for a harder version.
Movement: Pull the handles toward your upper face, separating the hands as you do and allow the elbows to flare out to the sides. At the end of the movement, the hands should be beside the ears, with the elbows high. Return slowly.
Key cues:
- Keep the elbows at or above shoulder height throughout
- Focus on the external rotation at the end of the pull
- Avoid letting the body swing or the hips drop
Face pulls are a useful addition for anyone who does a lot of pressing work, as they help balance the shoulder joint by strengthening the muscles on the back of the shoulder.
TRX Shoulder Exercises (Push)
Push-based TRX movements primarily target the anterior deltoid and chest, but they also place significant demand on the shoulder stabilizers due to the unstable surface. Unlike a fixed push-up on the floor, the moving handles require constant adjustment from the muscles around the shoulder joint, making these exercises more demanding than they might appear.
TRX Push-Up
The TRX push-up follows the same basic pattern as a floor push-up, but the instability of the handles considerably increases the demand on the stabilizers.
Setup: Adjust the straps so the handles hang a foot or two above the floor. Face away from the anchor point and hold one handle in each hand, arms extended and palms facing down.
Choose your starting position based on your current strength level. Walk your feet further forward, so your body is more upright, to make it easier. Or, walk your feet further back, allowing your body to come closer to the ground, if you’re more advanced. The most advanced level would be starting with the straps directly below the anchor point.
Movement: Lower the chest toward the handles by bending the elbows, keeping the body in a straight line. Press back up to the start position.
Key cues:
- Keep the core engaged throughout to maintain the plank position
- Avoid letting the hips rise or sag
- The straps should stay off your arms throughout the exercise
A solid foundation in standard push-ups and core control is worth building before moving to the TRX version.
TRX Atomic Push-Ups
The atomic push-up combines a push-up with a knee tuck, making it a full-body movement that demands significant shoulder and core strength.
Setup: Place the feet in the foot cradles and walk the hands forward into a plank position on the floor.
Movement: Perform a push-up, then at the top of the movement, draw the knees toward the chest in a controlled tuck. Extend the legs back out and repeat.
Key cues:
- Maintain a strong plank position throughout
- Control the extension of the legs to avoid swinging
This is an advanced variation that requires a solid foundation in shoulder stability, core strength, and push-up mechanics before attempting it. Rushing into this exercise without that foundation increases the risk of compensating in ways that put unnecessary stress on the shoulder joint.
TRX Shoulder Exercises (Other Movements and Combinations)
Not every effective shoulder movement fits neatly into a fly, pull, or push category. The exercises in this section involve more complex movement patterns or combine elements from multiple categories. They tend to recruit the shoulder muscles in a more integrated way, which can be a useful addition once you have a solid base in the foundational movements.
TRX Swimmers Pull
The swimmers pull mimics the arm action of a swimming stroke and targets the posterior deltoid, triceps, core muscles, latissimus dorsi, and the muscles around the shoulder blade.
Setup: Adjust straps to mid-length. Face the anchor point and lean back with a straight body, arms extended in front of you and palms facing down. Take your feet further back to make the exercise easier, or step them forward to make it harder.
Movement: Pull the arms down and back, keeping them relatively straight. Squeeze your shoulder blades together at the top of the movement, and keep your ribs down throughout the exercise to avoid arching the back. The movement should feel like you’re pulling through water. Return slowly to the start position.
Key cues:
- Keep the shoulder blades moving throughout, not locked in place
- A steeper body lean increases the load
The swimmers pull is a relatively accessible movement for those with some TRX experience and offers an excellent way to build back, shoulder, and core strength.
TRX Hammer Pull
The hammer pull is a really fun exercise to try, as you’re simultaneously using a pulling motion with one arm and a reverse fly motion with the other. It targets the posterior deltoid, biceps, and upper back.
Setup: Adjust straps to mid-length. Face the anchor point and lean back, holding the handles with palms facing each other and both arms extended. Move your feet back and allow your body to be more opright for an easier start postion. Or, step further forward to lower your body closer to the ground and make the exercise harder.
Movement: Let both arms work together. While one elbow pulls back into a row-style movement, the other arm extends straight out to the side (the movement of the extended arm is similar to the movement in the T fly). Lower back to the start position with control, and then repeat on the other side.
Key cues:
- Keep the wrists neutral throughout
- Keep the shoulders back and down, and squeeze shoulder blades together at the end range of the movement
- Maintain a straight body line from head to heels
TRX Shoulder Scarecrow
The scarecrow is a more complex movement that combines exernal shoulder rotation with a pulling patterns. It also incorporates a shoulder press movement as part of the combination. It’s generally considered intermediate to advanced, but it can be approached at a beginner-intermediate level when performed with a more vertical body position, a slow tempo, and careful attention to form.
How to Perform the TRX Shoulder Scarecrow
Setup: Adjust straps to mid-length. Face the anchor point and lean back slightly, arms extended forward and palms facing down.
Movement:
- Pull the elbows back to a 90-degree bend, allowing the body to come up as you do so
- From that position, rotate the shoulders untl the elbows point downwards and hands point upwards, ensuring the elbows are in line with the shoulders and maintain the 90-degree bend. As you perform this movement, the body will become even more upright
- Reach arms overhead by extending the elbows, then lower them back to a bent position (as in a shoulder press movement)
- Reverse the rotation, then extend the arms back to the start
The key is to separate the various parts of the movement: pull, rotate, press, lower, rotate, release. Rushing through them together reduces the benefit and increases the risk of compensating with the neck or upper traps.
Muscles Targeted and Common Mistakes
The scarecrow primarily targets the posterior deltoid, infraspinatus, and teres minor, which are two of the rotator cuff muscles responsible for external rotation. It also involves the mid-trapezius and rhomboids during the pulling phase.
Common mistakes include:
- Shrugging the shoulders during the pull phase
- Losing the 90-degree elbow angle during rotation
- Moving too quickly through the rotation, which reduces rotator cuff engagement
- Using too steep a body lean before the movement pattern is established
Starting with a more upright position and a slow, deliberate tempo allows you to build the coordination this movement requires before adding load by increasing body angle.
TRX Shoulder Rehab and Rotator Cuff Exercises
The TRX can be a useful tool during shoulder recovery, but it’s worth being clear about what that means. It may support the process of rebuilding strength and stability when used appropriately and progressively. It is not a treatment, and it doesn’t replace professional care. If you’re managing a shoulder injury or returning from one, working with a qualified physiotherapist, sports medicine professional, or movement specialist is the most sensible starting point.
Safe TRX Movements for Shoulder Recovery
Low-load, controlled movements are often the most appropriate starting point for those in the early stages of shoulder recovery. The adjustability of the suspension trainer is genuinely useful here, because you can reduce the load significantly by standing more upright and increase it gradually as strength and confidence return.
Movements that are often considered more accessible during recovery include:
- TRX low row with a very upright body position
- TRX rear deltoid fly with minimal lean
- TRX W fly at low load, focusing on the external rotation component
- TRX face pulls with slow, controlled tempo
These are general observations, not prescriptions. What is appropriate for one person may not be appropriate for another, depending on the nature of the injury, how far along recovery is, and what a qualified professional has recommended.
Progression Tips for Returning From Injury
Returning to full shoulder training after an injury tends to go better when progression is gradual and based on how the shoulder responds, rather than a fixed timeline. A few principles that can support a smoother return:
- Start with a more upright body position and increase the lean only when the current level feels comfortable and pain-free
- Prioritize control over load, especially in the early stages
- Pay attention to how the shoulder feels during and after each session, not just in the moment
- Include rotator cuff-focused movements like the W fly and scarecrow alongside larger compound movements
Recovery timelines vary considerably between people. Factors like age, the nature of the injury, sleep, stress, and overall health all play a role. Patience with the process tends to produce better long-term outcomes than pushing through discomfort.
When to Seek Professional Guidance
Some situations call for professional input rather than self-managed progression. It’s worth consulting a qualified health or movement professional if:
- You have sharp or persistent pain during or after shoulder exercises
- You’ve had a recent shoulder injury, surgery, or diagnosis
- You notice significant weakness or instability in one shoulder compared to the other
- Your symptoms are not improving or are getting worse with training
TRX exercises can be a helpful part of a shoulder health routine, but it works best when paired with appropriate professional support when there is an underlying issue to address.
How to Structure a TRX Shoulder Workout
There’s no single correct way to structure a TRX shoulder workout. The templates below are starting points, not fixed rules. Your training history, recovery capacity, and the amount of shoulder work you’re already doing in other sessions will all influence what makes sense for you.
Beginner Workout Template
If you’re new to TRX or to shoulder training in general, a shorter session focused on movement quality is more useful than a high-volume approach. A simple starting structure might look like:
- TRX rear deltoid fly: 2 sets of 10-12 reps, focusing on controlled movement
- TRX low row: 2 sets of 10-12 reps, starting with an upright body position
- TRX Y-raises: 2 sets of 10-12 reps, prioritizing shoulder blade control
- TRX push-up (modified): 2 sets of 10-12 reps, adjusting strap height as needed
Rest between sets as needed. The goal at this stage is to build familiarity with the movements and develop the shoulder stability that makes more demanding exercises safer and more effective later on.
Intermediate and Advanced Programming
With a solid foundation in place, you can increase volume, add more complex movements, and experiment with body angles that increase the load. An intermediate to advanced session might include:
- TRX T or W deltoid fly: 3 sets
- TRX face pulls: 3 sets
- TRX single arm row: 3 sets per side
- TRX atomic push-up: 2-3 sets
- TRX shoulder scarecrow: 2-3 sets, with attention to tempo
At this level, it’s worth thinking about how your TRX shoulder workout fits into your broader training week. Shoulders are recruited in chest and back sessions, so the total weekly load on the shoulder muscles is likely higher than it appears from any single workout.
Recovery, Rest, and Frequency Recommendations
How often you train your shoulders depends on factors that vary between individuals, including your overall training volume, recovery quality, age, and stress levels. A general principle is to allow enough time between sessions for the shoulder muscles to recover before training them again at high intensity.
Worth knowing: because the shoulders are involved in so many upper body movements, they rarely get a full rest day even when you’re not specifically targeting them. Keeping that in mind when planning your week can help you avoid accumulating more fatigue than you realize.
Sleep, nutrition, and stress management all influence how well you recover between sessions. These aren’t separate concerns from your training; they’re part of the same picture.
Frequently Asked Questions About TRX Shoulder Exercises
For some people and some goals, TRX can provide enough stimulus to build and maintain shoulder strength without traditional weights. For others, particularly those focused on building significant muscle mass or working toward specific strength benchmarks, free weights or machines may offer advantages that suspension training alone doesn’t fully replicate.
The more useful question is probably whether TRX meets your current needs. If it does, and you’re progressing over time, it’s working. If you find you’ve plateaued or your goals have shifted, adding other tools makes sense
There’s no universal answer here, as it depends on your goals and what your full training programme looks like. If you’re doing a full upper body TRX workout three times a week, your shoulders are likely getting more work than a dedicated shoulder session count suggests.
Pay attention to how your shoulders feel between sessions. Persistent fatigue or soreness that doesn’t resolve with rest is a signal to reduce frequency or volume, not push through
Many TRX shoulder exercises are accessible to beginners when approached with appropriate body positioning and a focus on form. The adjustability of the suspension trainer is one of its genuine strengths for newer exercisers, because load can be reduced significantly by standing more upright.
That said, some movements, like the atomic push-up and the shoulder scarecrow, require a foundation of shoulder stability and body control before they’re appropriate. Starting with simpler movements and building from there is a more sustainable approach than jumping straight to the most complex variations.
Key Takeaways for TRX Shoulder Training
Your body position is one of the most powerful variables in TRX training. Small adjustments in angle, grip, and tempo can shift the emphasis between deltoid heads, increase or reduce load, and change how much the rotator cuff is involved. Getting familiar with how those adjustments feel is worth the time it takes.
Progressive loading matters here just as it does with any other form of training. Starting with movements you can perform well and gradually increasing the challenge tends to produce better results than rushing toward advanced variations before the foundation is in place.
Individual variation is real. What works well for one person’s shoulders may not suit another’s, depending on training history, mobility, and recovery capacity. Use the guidance in this article as a starting point, and adjust based on how your body responds.
If you’re ready to put these principles into practice, pick two or three of the TRX shoulder exercises covered here and focus on building quality movement before adding load. What questions do you have about getting started?
DISCLAIMER: This article/page contains affiliate links. This means that if you make a purchase after clicking on one of these links, then we may receive a small commission – at no extra cost to you. See our full disclosure and Privacy Policy for more information. Thank you for supporting the site and helping make it the most helpful holistic health and fitness online magazine it aims to be!


0 Comments